Green Screen in CapCut Pro is a powerful chroma key feature that lets you remove a solid-coloured background and replace it with virtually any image, video, or custom backdrop. Once the green background is removed, you can place your subject in a different location, create cinematic scenes, or design professional-looking content without expensive equipment or complex editing software. Thanks to CapCut Pro’s intuitive interface, even first-time users can achieve clean and realistic results within minutes.
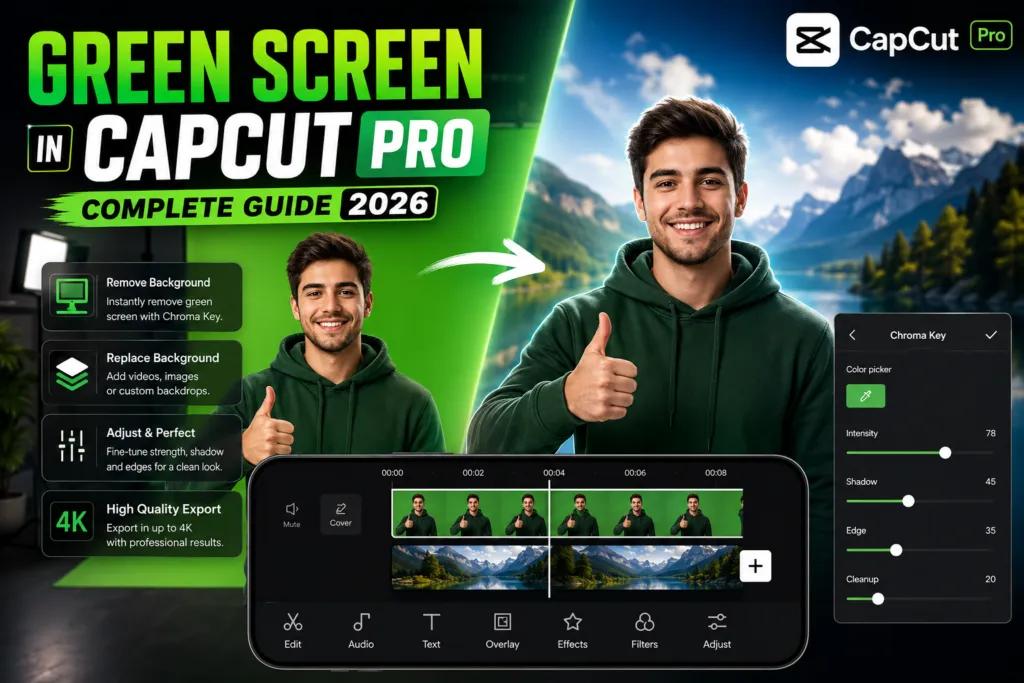
Whether you’re creating YouTube videos, TikTok content, Instagram Reels, gaming videos, online tutorials, or promotional content, the Green Screen tool helps you produce more engaging and visually appealing videos. Simply import your footage, apply the Chroma Key feature, adjust the colour intensity and edge settings, and replace the background with your preferred media. With a little practice, you can create seamless edits that make your videos look polished, creative, and ready to share across any social media platform.
Understanding Green Screen in CapCut Pro
The Green Screen feature in CapCut Pro uses chroma key technology to remove a single background colour, typically green, from your footage. Once the green background is detected, it becomes transparent, allowing you to replace it with another video, image, animation, or virtual background. This technique is widely used by content creators, filmmakers, educators, and marketers to produce professional-looking videos without the need for expensive studio setups.
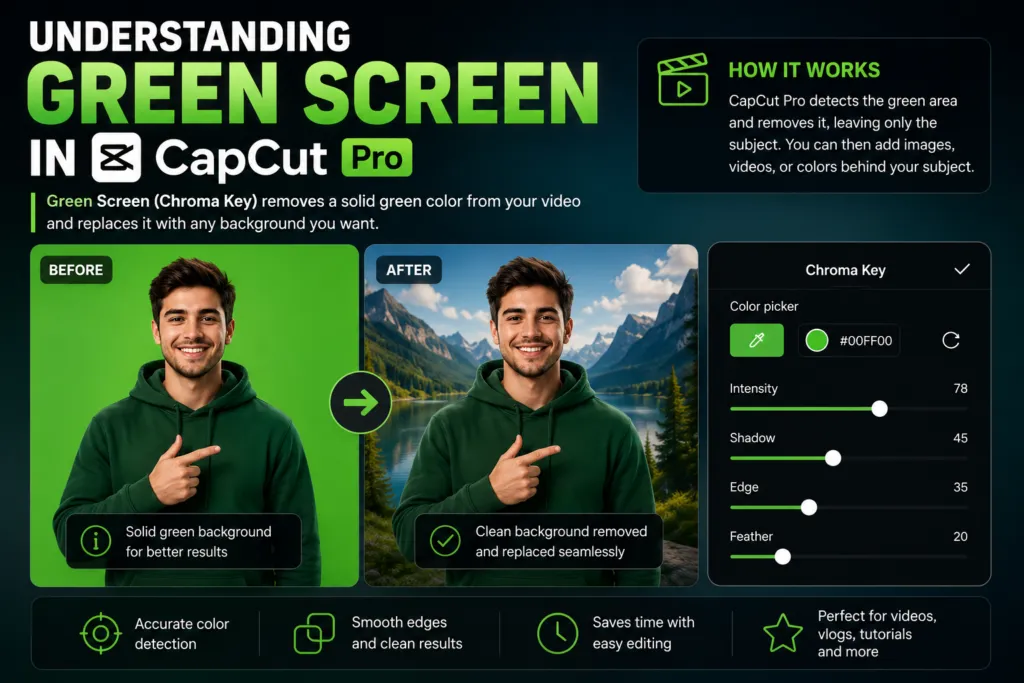
For the best results, record your video against a well-lit, wrinkle-free green backdrop with consistent lighting. CapCut Pro’s Chroma Key tool accurately detects the selected colour and offers controls to fine-tune edge smoothness, shadow removal, and colour intensity. These adjustments help create clean cut-outs with natural-looking edges, reducing unwanted artefacts around your subject. Once you understand how lighting, colour selection, and edge refinement work together, creating realistic green screen effects becomes quick, simple, and highly effective.
Green Screen vs. Standard Background Removal
Although both editing methods replace a video’s background, they work in different ways. Green Screen (Chroma Key) removes a specific colour from the footage, while AI background removal automatically identifies and separates the subject from the background using machine learning. Because chroma key relies on colour rather than object detection, it generally produces cleaner, more accurate results when the footage is recorded correctly.
For creators producing YouTube videos, TikTok clips, Instagram Reels, online courses, gaming content, product demonstrations, or business presentations, a green screen often delivers more consistent and professional-looking edits than automatic background removal. With proper lighting and a high-quality green backdrop, CapCut Pro can create seamless composites that require minimal manual adjustments, making it an excellent choice for anyone seeking polished, studio-quality videos.
What You Need Before Using Green Screen in CapCut Pro
Creating realistic green screen effects in CapCut Pro starts with the right setup. While the app’s Chroma Key tool is powerful, the quality of your final edit depends largely on how your footage is recorded. A properly prepared background, good lighting, and correct camera positioning will help you achieve clean edges and natural-looking results with minimal editing.
Before you begin, make sure you have the following:
- A Solid Green Background: Use a green fabric, paper backdrop, painted wall, or professional green screen. The surface should be smooth, wrinkle-free, and evenly coloured.
- Consistent Lighting: Illuminate the green screen evenly to eliminate shadows and bright spots that can interfere with colour detection.
- Separate Lighting for the Subject: If possible, light your subject independently from the background. This improves edge detection and creates a more natural separation.
- Proper Distance: Position yourself a short distance away from the green screen to reduce shadows and prevent green light from reflecting onto your clothing or skin.
- Appropriate Clothing: Avoid wearing green or colours that closely match the background, as they may also be removed during the chroma key process.
- Stable Camera Setup: Use a tripod or stable surface to minimise camera movement and capture sharper, more professional footage.
A well-prepared setup allows CapCut Pro to detect the green background more accurately, resulting in smoother background replacement and less time spent making manual adjustments.
Common Green Screen Mistakes to Avoid
Many green screen issues are caused during recording rather than editing. Correcting these problems before you start editing will save time and produce significantly better results.
- Uneven Lighting: Bright and dark areas on the green screen make it difficult for the Chroma Key tool to remove the background consistently.
- Wrinkled or Folded Backdrops: Creases create shadows and colour variations that reduce background removal accuracy.
- Standing Too Close to the Background: This often creates unwanted shadows and green colour spill around the edges of your subject.
- Wearing Green Clothing or Accessories: Any object matching the background colour may become transparent during editing.
- Low-Quality Video Recording: Recording in higher resolutions with good lighting helps CapCut Pro detect edges more precisely and produce cleaner composites.
- Ignoring Camera Stability: Shaky footage can make editing more difficult and reduce the overall quality of the final video.
By following these best practices, you’ll achieve cleaner keying, smoother edges, and professional-looking green screen videos that are ideal for YouTube, TikTok, Instagram Reels, tutorials, presentations, and other creative projects.
How to Use Green Screen in CapCut Pro: Step-by-Step Guide
Using the Green Screen (Chroma Key) feature in CapCut Pro is straightforward once you understand the workflow. By layering your footage correctly and fine-tuning the Chroma Key settings, you can replace a plain green background with virtually any image or video to create professional-looking content.
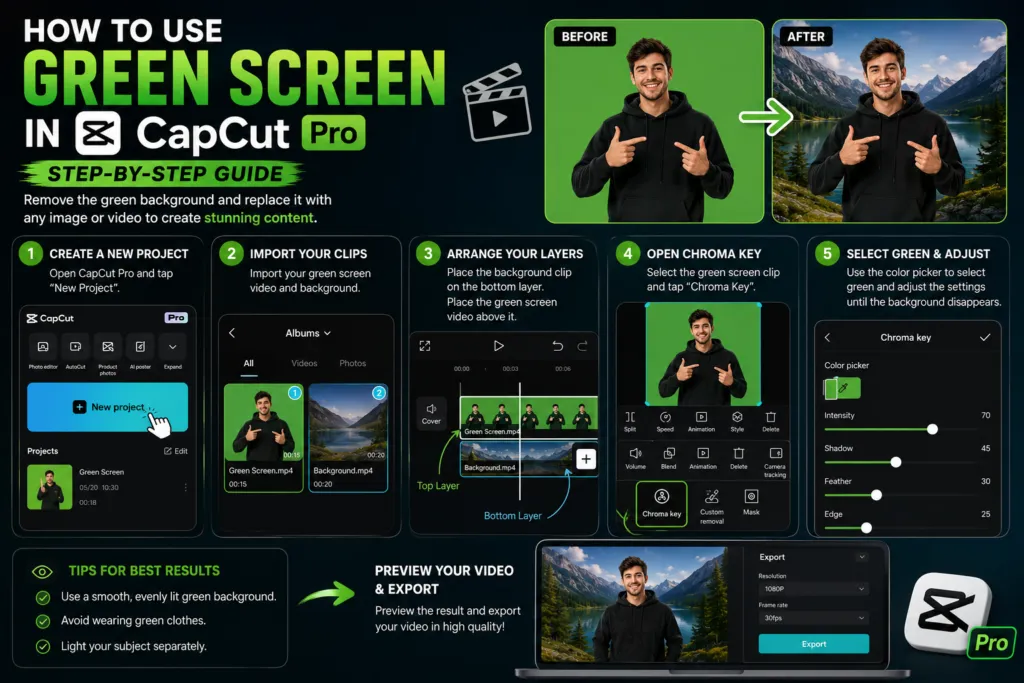
Step 1: Create a New Project
Open CapCut Pro and tap New Project. Import both your green screen video and the background you want to use, whether it’s an image, animation, or another video.
Step 2: Arrange Your Layers
Place your background clip on the main timeline. Then add the green screen footage as an overlay so it appears above the background layer.
Step 3: Open the Chroma Key Tool
Select the green screen overlay, navigate to Chroma Key, and use the colour picker to select the green background in your video.
Step 4: Remove the Green Background
Adjust the Intensity and Shadow settings until the green background disappears while keeping your subject’s edges clean and natural. Make small adjustments rather than increasing the settings too aggressively.
Step 5: Preview and Export
Play your video several times to check for colour spill, missing edges, or unwanted transparency. Once you’re satisfied with the results, export your project in your preferred resolution, including 1080p or 4K on supported devices.
Optimising Green Screen Settings for Better Results
Fine-tuning the Chroma Key settings is essential for achieving realistic background replacement. Start by increasing the colour intensity gradually until the background is fully removed. If parts of your subject begin disappearing, reduce the intensity slightly and adjust the Shadow or Edge controls to restore natural-looking outlines.
Preview your edits frequently throughout the process. Small refinements often produce significantly better results than making dramatic changes all at once. Taking a few extra moments to perfect the settings can make your final video look much more professional.
Using Green Screen in CapCut Pro on Android and iPhone
The Green Screen feature is available on both Android and iPhone, allowing creators to edit videos directly from their mobile devices. The editing process is nearly identical across platforms, making it easy to switch between devices if needed.
On Android, CapCut performs well for everyday editing, social media videos, and short-form content. On iPhone, the app benefits from Apple’s hardware optimisation, offering responsive touch controls and smooth playback during editing. Both platforms support features such as AI editing, keyframe animation, advanced transitions, and high-resolution video exports, making them excellent choices for editing on the go.
Mobile vs Desktop: Which Is Better for Green Screen Editing?
Choosing between mobile and desktop depends on the complexity of your projects and your editing workflow.
Mobile editing is ideal for:
- TikTok videos
- Instagram Reels
- YouTube Shorts
- Quick social media edits
- Editing while travelling
Desktop editing is better for:
- Long-form YouTube videos
- Multi-layer editing
- Professional productions
- Precise edge refinement
- High-resolution projects
For creators who regularly produce professional content, desktop editing generally offers greater flexibility and control.
Green Screen Editing on CapCut for PC and Mac
Using CapCut on Windows or Mac provides a more comfortable editing environment thanks to larger displays, greater processing power, and precise keyboard and mouse controls. These advantages make it easier to identify small imperfections and produce cleaner composites.
Desktop users also benefit from faster rendering, smoother timeline navigation, improved project management, and greater accuracy when adjusting Chroma Key settings. For creators working with 4K footage, multiple overlays, or complex visual effects, editing on a computer provides a noticeable productivity boost.
Why Desktop Editing Delivers Better Precision
A larger workspace makes it easier to inspect edges, remove green colour spill, and fine-tune transparency. Mouse input allows for more accurate adjustments than touch controls, helping you create cleaner, more polished green screen effects with less effort.
How to Fix Common Green Screen Problems in CapCut Pro
Even with a good editing tool, green screen issues can occur if the footage isn’t recorded correctly. Fortunately, most problems can be resolved quickly.
Green Edges Around the Subject
This is usually caused by uneven lighting or green colour reflecting onto your subject. Improve your lighting setup and fine-tune the Chroma Key settings to minimise colour spill.
Background Doesn’t Disappear Completely
If parts of the green screen remain visible, the background may not be evenly lit. Increase the colour intensity gradually while ensuring the original footage has consistent lighting.
Subject Appears Transparent
Over-adjusting the Chroma Key intensity can accidentally remove parts of your subject. Reduce the intensity slightly and adjust the shadow settings until the edges look natural again.
Quick Green Screen Fixes That Work
If your edits don’t look quite right, try these proven solutions:
- Light the background evenly.
- Keep your subject away from the green screen.
- Use a wrinkle-free backdrop.
- Record in high resolution whenever possible.
- Adjust Chroma Key settings gradually.
- Preview your project frequently before exporting.
These simple improvements often solve the majority of green screen editing problems.
Does CapCut Pro Improve Green Screen Quality?
Yes. CapCut Pro provides additional editing tools and finer controls that help produce cleaner and more professional green screen effects. Features such as improved edge refinement, advanced masking, AI-powered editing tools, premium effects, and high-quality exports can make the editing process faster and more efficient for frequent content creators.
While the standard version of CapCut includes the basic Chroma Key feature, users who edit videos regularly may appreciate the additional creative tools and workflow enhancements available in premium versions where applicable.
Is CapCut Pro Worth It for Green Screen Editing?
If you frequently create YouTube videos, TikTok content, Instagram Reels, tutorials, gaming videos, or promotional content, CapCut Pro can be a valuable investment. The additional editing tools, creative assets, and workflow improvements help reduce editing time while making it easier to produce professional-looking videos.
For occasional editing, the standard version may already provide the functionality you need. The right choice depends on how often you edit and which advanced features are important for your projects.
Frequently Asked Questions
What is the Green Screen feature in CapCut Pro?
The Green Screen or Chroma Key tool removes a solid-coloured background and replaces it with an image, video, or virtual backdrop, allowing you to create professional-looking visual effects.
Why does my green screen have rough or blurry edges?
This usually happens because of uneven lighting, wrinkles in the background, low-quality footage, or overly aggressive Chroma Key settings. Improving your recording setup typically produces much cleaner results.
Can I use Green Screen in CapCut on Android and iPhone?
Yes. CapCut supports Green Screen editing on both Android and iPhone, allowing you to create professional background replacements directly from your mobile device.
Is desktop better than mobile for Green Screen editing?
Desktop editing offers greater precision thanks to larger displays, keyboard and mouse controls, and increased processing power. Mobile devices, however, are excellent for quick edits and social media content creation.
What is the best way to improve Green Screen quality in CapCut?
Use a smooth green backdrop, maintain even lighting, record high-resolution footage, keep your subject away from the background, and fine-tune the Chroma Key settings gradually for the cleanest results.
Conclusion
The Green Screen feature in CapCut Pro makes professional background replacement accessible to creators of every skill level. With the right recording setup, proper lighting, and a basic understanding of the Chroma Key tool, you can produce clean, realistic edits without using complicated desktop software. Whether you’re creating videos for YouTube, TikTok, Instagram Reels, online courses, or marketing campaigns, mastering green screen editing will significantly improve the quality of your content.
The key to achieving professional results is preparation. Use a well-lit green backdrop, make gradual Chroma Key adjustments, keep your app updated, and practise regularly. As you refine your workflow, creating seamless background replacements will become faster, easier, and more consistent, helping your videos stand out across every platform.