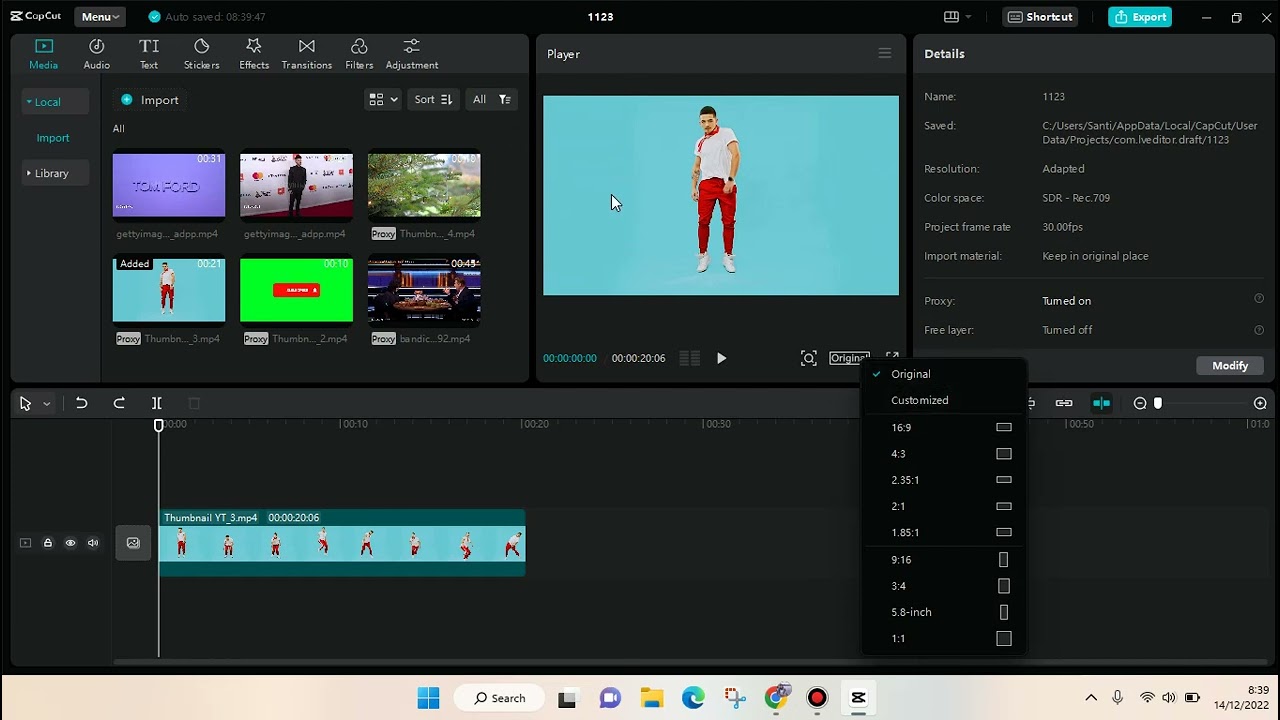
Adding keyframes in CapCut PC is a straightforward process that brings your animations to life. Open your project and select the clip or element you want to animate. Look for the keyframe icon in the timeline and click it to set your starting point. Move the playhead to where you want the next keyframe, adjust the element, and click the keyframe icon again. Keep adding keyframes to create smooth transitions and effects. With these simple steps, you can master how to add keyframes in CapCut PC and boost your video editing skills. Happy editing!
Table of Contents
- 1 How to Add Keyframes in CapCut PC
- 2 Frequently Asked Questions
- 3 Final Thoughts
How to Add Keyframes in CapCut PC
CapCut has become a go-to video editing tool for many content creators. Its intuitive interface offers powerful features such as keyframes, enabling you to animate elements within your video subtly. If you are wondering how to add keyframes in CapCut PC or how to get CapCut Pro for free, you are in the right place! This guide will cover everything you need to know about using keyframes to enhance your videos, presented in an easy-to-follow manner.
What Are Keyframes?
Before diving into how to add keyframes in CapCut PC, it’s essential to understand what keyframes are. Keyframes are specific frames in a video where you define the starting and ending points of any transition or effect. Essentially, they mark significant changes in your video, allowing for animations and smooth transitions.
Why Use Keyframes?
Keyframes offer several benefits:
- Control: They give you precise control over your video’s elements.
- Creativity: They enable complex animations, enhancing your video’s visual appeal.
- Customization: They allow you to tailor transitions and effects to suit your narrative.
Setting Up CapCut PC
Before you start adding keyframes, ensure that you have CapCut PC installed and set up. Follow these steps to get started:
- Download and Install: Visit the official CapCut website and download the PC version. Run the installer and follow the on-screen instructions to complete the installation.
- Project Setup: Open CapCut and create a new project. Import your video files by clicking the “Import” button.
Adding Keyframes in CapCut PC
Now that your project is set up, let’s explore how to add keyframes in CapCut PC. We will go step by step to make it easy to follow.
Step 1: Select the Clip
First, select the video clip you want to add keyframes to. Drag and drop the clip onto the timeline.
Step 2: Access the Keyframe Feature
Once your clip is on the timeline, you need to access the keyframe feature:
- Click on the clip in the timeline to highlight it.
- Go to the “Effects” panel located on the right side of the screen.
- Find the “Transform” option and click on it.
Step 3: Add Your First Keyframe
Position the playhead where you want to add your first keyframe. It’s usually a good idea to start at the beginning of the clip:
- Click the diamond icon in the Transform panel to add a keyframe.
- A small diamond shape will appear on the timeline, indicating that a keyframe has been set.
Step 4: Modify the Clip
Change the properties of the clip (position, scale, rotation, etc.) to set your desired starting state. For example:
- Position: Drag the clip to change its position on the screen.
- Scale: Use the scale slider to adjust the clip’s size.
- Rotation: Adjust the rotation slider to rotate the clip.
Step 5: Add Additional Keyframes
Move the playhead to a new position where you want the next change to occur. Add another keyframe by clicking the diamond icon again, then modify the properties to your desired state. Repeat this process for each significant change you want in your animation.
Step 6: Preview the Animation
Once you have added all your keyframes, preview the animation by playing the video. Adjust the keyframes if necessary to achieve a smoother or more dynamic effect.
Practical Applications of Keyframes
Now that you’ve learned how to add keyframes, let’s explore some practical applications to elevate your video content.
Creating Smooth Transitions
Keyframes allow you to create smooth transitions between scenes or elements. For example, use keyframes to:
- Fade In/Out: Adjust the opacity over time to create a fade effect.
- Slide Transition: Move elements in and out of the frame for a sliding effect.
Animating Text and Titles
Make your text and titles stand out by animating them:
- Add keyframes to position text off-screen initially.
- Move the playhead and set another keyframe where the text slides into view.
- Combine with scaling and rotation for dynamic title animations.
Enhancing Visual Effects
Keyframes aren’t just for moving objects. Use them to control effects:
- Color Changes: Gradually shift the color of an element over time.
- Blur Effects: Increase or decrease blur to direct focus.
Tips and Tricks for Using Keyframes
To make the most of keyframes, keep these tips in mind:
Consistency is Key
Ensure consistency in your animations by spacing keyframes evenly. This avoids abrupt changes and makes your transitions smoother.
Use Ease In and Ease Out
Many animations look more natural when you ease in and out of movements. This means accelerating slowly at the start and decelerating at the end.
Practice and Experiment
Don’t be afraid to experiment. The more you practice, the better you’ll get at using keyframes effectively.
Common Keyframe Mistakes and How to Avoid Them
While keyframes are a powerful tool, it’s easy to make mistakes. Here are common pitfalls and how to avoid them:
Overcomplicating Animations
Avoid adding too many keyframes, which can make your animation look choppy and over-complicated. Stick to essential movements.
Ignoring Smooth Transitions
Make sure your transitions are smooth. Use even spacing and consistent changes to avoid jarring movements.
Not Previewing Regularly
Frequently preview your animations to catch mistakes early. This saves time and ensures a polished final product.
Advanced Techniques with Keyframes in CapCut PC
Once you’re comfortable with the basics, try these advanced techniques to take your videos to the next level:
Combining Multiple Effects
Use keyframes to combine multiple effects for complex animations:
- Stack effects like color changes and position shifts.
- Animate text while applying blur effects for a dynamic look.
Using Masks and Keyframes
Masks can create compelling visuals. Use keyframes to animate the mask, revealing or hiding parts of your video.
Layering Elements
Layer different video clips and animate them using keyframes. This can create a multi-dimensional effect, enhancing your storytelling.
Adding keyframes in CapCut PC might seem daunting initially, but with practice, it becomes an invaluable tool for any video creator. Keyframes offer the flexibility to animate and refine elements within your video, adding a professional touch to your final product. Experiment with different keyframe techniques and take your video editing skills to the next level. Happy editing!
How to Use Keyframe in CapCut PC ✅
Frequently Asked Questions
How do I animate my objects in CapCut PC?
To animate objects in CapCut PC, use the keyframe feature. First, select the object you want to animate on the timeline. Then, click the “Add Keyframe” icon at the point where you want the animation to start. Move the playhead to where you want the animation to end and adjust the object’s position, scale, opacity, or other properties. CapCut will automatically create a smooth transition between the keyframes.
Can I add keyframes to audio files in CapCut PC?
Yes, you can add keyframes to audio files in CapCut PC. Select the audio file on your timeline, and then move the playhead to where you want to add a keyframe. Click the “Add Keyframe” button in the audio editing panel. You can adjust the volume or other audio properties at different keyframes to create dynamic audio effects.
What are some common uses of keyframes in video editing with CapCut PC?
Keyframes are frequently used for various effects and transitions in CapCut PC. Common uses include animating text, creating smooth transitions, zooming in and out of footage, adjusting the opacity of objects, and controlling audio levels. By strategically placing keyframes, you can make your videos more engaging and professional.
Is it possible to copy and paste keyframes in CapCut PC?
Currently, CapCut PC does not support copying and pasting keyframes directly. To recreate the same keyframes, you need to manually add new keyframes and adjust the properties similarly. Although this might take more time, it ensures precise control over each keyframe.
How can I delete keyframes in CapCut PC?
To delete keyframes in CapCut PC, first, select the object or clip that contains the keyframes. Navigate to the specific keyframe you want to remove by moving the playhead. Click on the keyframe marker and press the “Delete” key on your keyboard or use the delete option available in the keyframe control panel.
Final Thoughts
To add keyframes in CapCut PC, first import your media and place it on the timeline. Select the clip and navigate to the keyframe button located above the timeline. Click the button to set your first keyframe, then move the playhead and adjust the clip properties to set additional keyframes. This process allows for precise control over animations and effects. Experiment with various adjustments to enhance your project. By understanding how to add keyframes in CapCut PC, you can create professional-quality edits with ease.


